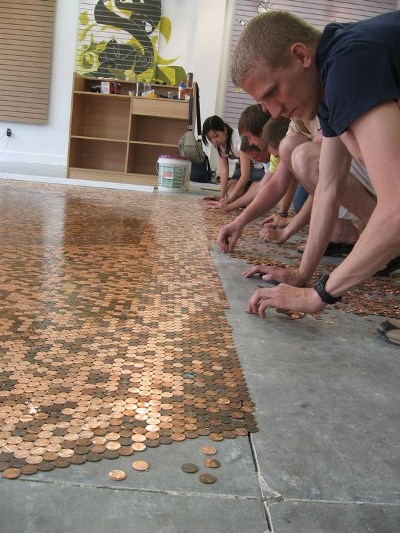
Awhile back – actually way before any concrete plans for this renovation materialized – I came across these pictures of penny-tile floors and thought – that might be cool thing to do at some point somewhere in the house. Sergey was totally on board. In fact, I think he actually sent me a picture of the penny time floor for inspiration. It’s not that often that we agree on a particular project or look from the very beginning so this idea was definitely filed in the “for sure, maybe” file.
So, when time came to actually do the renovation, we were all about the penny tile floor. And the powder bath downstairs by the kitchen seemed like the perfect spot. Small enough for a wow factor, without being in your face. So, we were totally committed to the idea, until we looked at our wallpaper and realized how much better Russian coin worth 1/10 of the ruble – 10 kopeik – would look next to it. I mean really. And then there is the whole quirky/cool factor – we are originally from Russia, we have a Russian coin floor. Neat, right?
HOW TO: Penny Tile Floor
Procuring the Goods: Procuring thousands of kopeikas was quite a task. The logistics of securing 3,000 coins, and then transporting them from Russia to he US, were kind of ridiculous. Obviously we weren’t about to get on the plane to get the coins — we are committed to the project, but not that committed. So we had to convince some very sweet friends and family to follow along with our plan, even though we must seem like crazy people. I don’t even want to know how the bank tellers reacted to a request for several thousand coins, which combined were worth 300 Russian rubles, or just about $10.
So off to Moscow – DC and Moscow – NYC planes went ferrying three different sets of passengers with our kopeiks goods. At one point we had one person leave a pouch of coins for another person at the hotel front desk for pick up. I am sure the concierge thought nothing of it, nope nothing at all, just a heavy pouch passed from a Russian to a Romanian, with undisclosed contents. Thank you friends!
Arranging the tile sheets: The far easier part was arranging the coins. We used the same sticky mesh that is used to fix drywall issues. We cut the mesh into 6″ by 18″ rectangles ( I figured out the rectangle size by the total size of the room). This way instead of plopping coins into thinset one by one, our contractors can hopefully transfer it in sheets – making their job easier and faster.
Calculate the pattern: I decided to go with minimal spacing between the coins, which turned out not have been the best decision (see below). Sergey’s brother, Nikita did the majority of the work on that first attempt (yay for visitors and thank you!)
Yep, so that all went really well…until we ran out of coins just before finishing the floor. Uff, should have done my math better. We actually had enough to cover nearly all of the floor this way, but nearly enough wasn’t going to be looking nearly good enough. And at the point we realized that, I was not interested in taking pictures…
All the pennies came off, and we redid the whole floor with the help of Kirill, Nikita and Nikita’s girlfriend, Natalie (thank you all — we would still be arranging coins if not for your help!). Below the floor resting on cardboard in all its finished, spaced glory. The blue tape is the approximate outline of the toilet. Next steps will be installing these babies – fingers crossed it goes smooth!


