It’s really starting to feel like we are pretty much done with the Big Project, aka phase II renovation. Because there are no more construction materials all over first floor. And no more fridge and electric plates in the dining room. AND! The built-in-shelf is done!

* Done is a relative term of course – the walls around it obviously need some work, and we still need to make a toe-kick, which must allow air flow as the A/C return valve is under the cabinets.
We have certainly come a long way here. One of those – you “Biggest Embarrassment” moments is that from July 2010 through March 2012 the corner of our dining room looked like this:

Then in March 2012, on my birthday, we finally set out with the big plan. We absolutely had to create this space, not only because we were tired of looking at the ugly vent, but because we needed a place for all of our kitchen crap while we renovated. Once planned, the project proceeded rather quickly, and in just a few weeks, we had a huge amount of functional storage space.
Here we are – camping out kitchen in our dining room from April 2012 through October 2012:

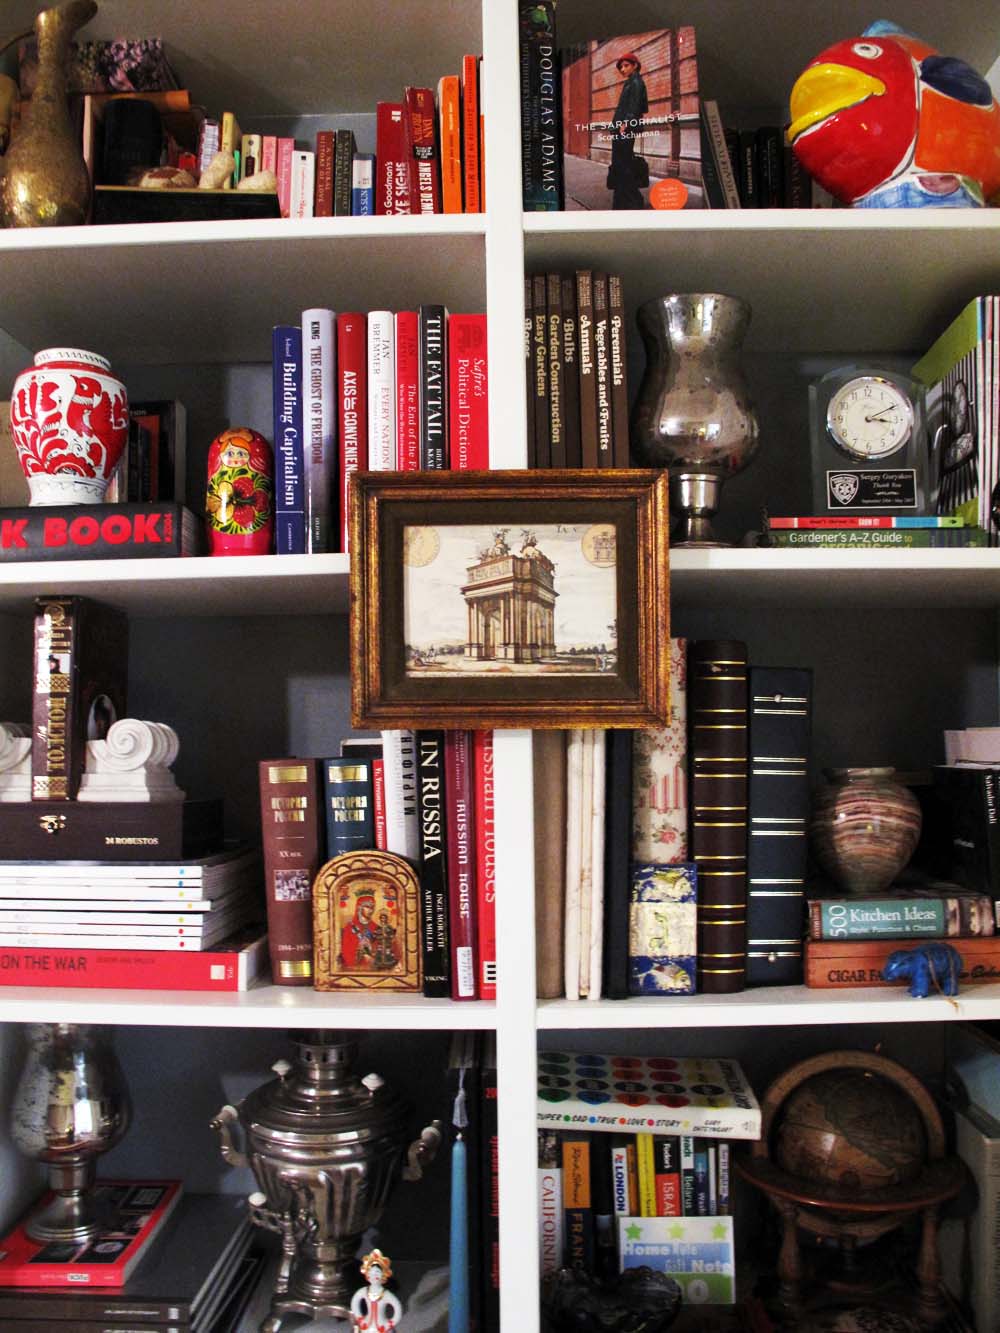
Although the majority of the project was done ahead of the kitchen renovation back in March-April, the built-in still had a rather rough look to it. It really only needed polish with molding filler pieces to the make the edges of plywood look nicer. We did the finishing touches the weekend before Sergey’s birthday, in November, and now the built-in shelves look like this:

HOW TO: The Built-in Finishing Touches
We purchased the 0.5″ wide molding strips from six months ago, so I just had to prime and paint, and then Sergey cut them to appropriate length of our shelves.

We borrowed our contractor’s nail gun, which made quick work out of this project. In fact, before I had a chance to take more pictures it was already done.


Finally, we used wood filler to cover up the nail holes and I did one more coat of paint (Benjamin Moore – minced onion in semigloss, which is a very close match for Ikea white). The was it!

My favorite part of the whole built-in project was the last one — styling! I use the standard rules for arranging the shelves:
- Large items – like the mercury glass candle holders and the samovar – go first;
- Next up a few large books arranged horizontally;
- Smaller book volumes by topic or by color if you prefer;
- Finally the chachkas fill in the remaining spaces
I will need to come back to this as we have more books, some stuff should go and new things are to be added. But for now, this is looking pretty good!