So apparently my choice of colors for the house is a) monochromatic and b) goes in phases. I am in what Sergey calls a “black phase” which follows a “white phase.”
When the kitchen renovation started, Sergey was shocked and appalled at the idea of everything being white: cabinets? white, tin ceiling? – white!, what even the floor?? – yep, white (though featuring black rosettes and black grout.) Oh and yea about the exposed brick…also white. Oohhhhh and don’t forget the kitchen sink — that’s also white. But being an awesome person – and extracting a promise from me that wherever we live next, our decor will follow His vision – Sergey had agreed to it all. Which is why he was incredulous at my suggestion of black counter tops. I did prep him by choosing a black ceiling in the bathroom.
Part of the reason for going black is that we eventually plan to install marble counters in the kitchen, which means white yet again. So I wanted to try out the polar opposite just to see how it looks. Another reason for doing any color at all was that we couldn’t just use Ikea butcher block together with butcher block island counter from our 100 year old joists from underneath our kitchen. The two different wood counters didn’t jive well together at all. I considered staining everything the same color and hoping that it would look uniform. But after a small test, it was very clear that it would work that well, and would look off.


HOW TO: Stain Butcher Block with Black Ink
Research and Source: I did a bit of research and found an Ikea kitchen over on ikea hackers, where the owners used black India ink to stain their butcher block. It looked awesome in pictures, so I was set. We purchased the lightest looking butcher block available, but I am pretty sure that any of the Ikea wood counters would work well. I would go with the least expensive option.

Sand: I used my electric orbital sander to go over the counters with 100-, 120-, 220- grit paper. In retrospect I could have probably added an 80- grit disk in there to ensure smooth and receptive to stain surface. Between each sanding wipe down the counter with a moist rag. This will help to get rid of the dust and will raise the remaining wood grain, so you know if the counter is actually smooth or not.

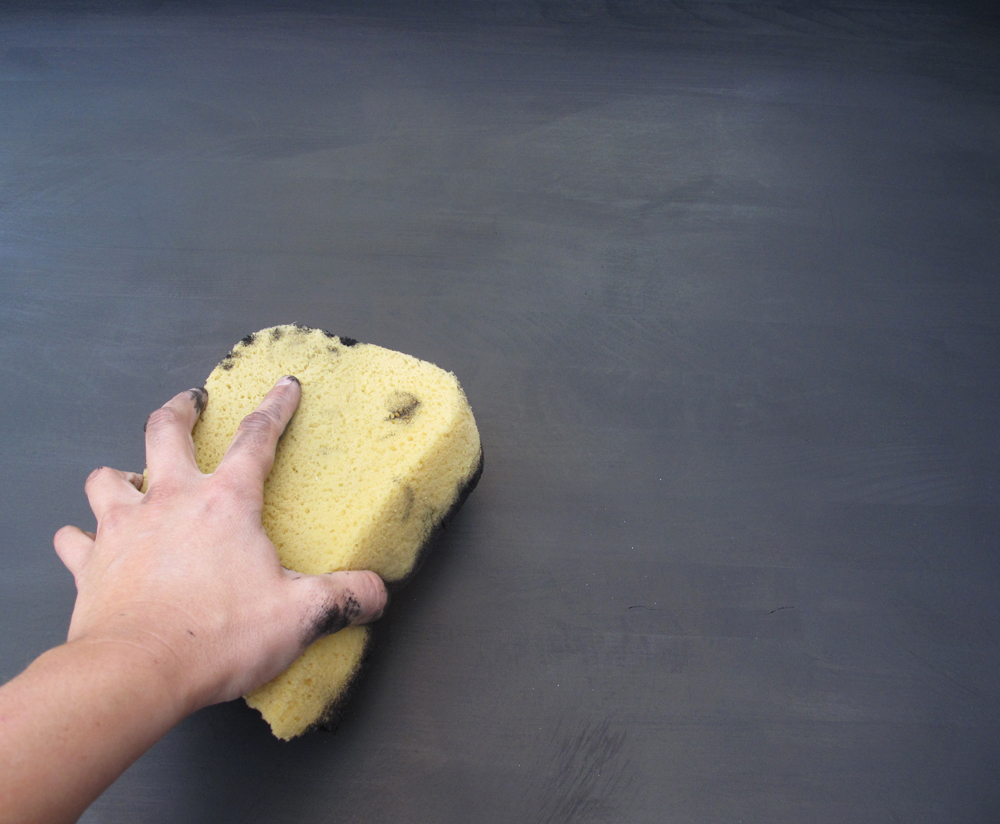
Stain: I had two different black inks on hand. One worked remarkable better than the other. The first brand tried was Higgins and it came out splotchy, streaky, and the color was uneven. I switched over Handy Velvet Waterproof Black India Ink and it made a huge difference. The color was deep and even. I also used a foam brush in the beginning, and the ink dried with brush marks. So I sanded it down a bit and tried a sponge. It came out absolutely beautiful without any marks at all. You can still see wood grains a bit, and I like that, because it doesn’t look painted. Two coats should do it.


Seal: India Ink is not resistant to water at all. I used Waterlox as original source on ikea hackers suggested. The stain goes on pretty glossy, but dries to a soft sheen.So far I have done three coats on top and bottom (you have to wait 24 hours between each coat), making sure to clean the top side from any dust particles each time. A couple more coats to go and these will be ready for install next week. Exciting!


UPDATE
Ahahahaa, the renovation gods must have had a laugh. not so fast! That last bit in sealing the counters, where I caution about the dust particles? Well they aren’t just a problem right before the sealer is applied. Ideally, the space where waterlox cures for the next 24 hours for each coat should be free of dust particles. HA! Like that’s possible around here. The dust settles into the sealer. It looks bad. So sand between the coats. i did the final coat a few weeks after the whole project began, and it seems to have finally turned out well. but, man, this is a pain!

When sanding, it looks kind of scary because the surface turns opaque and not so good looking. But once waterlox is re-applied, the milky surface is completely eliminated.
This thing better hold up well!
Update II
So a few months into using the counters, we are super happy with the overall look. But sadly, all of the efforts spent on sealing the counter with organic, super good for you, not dangerous at all Waterlox have been futile. We started to get water stains, and they are spreading. You can read about the solution that I finally settled on in Kitchen Counter Update.